


Most times people see the before and after pseudo-elements in a codebase that's not theirs and they start scrambling trying to wonder, what is this strange thing with two colons? Well not to worry, let's look into that, shall we.
This article will cover the before and after pseudo-elements, what they are? how do they work? And how you can use them.
What are the ::before and ::after pseudo-elements?
The ::before pseudo-element creates an element that becomes the first child of the selected element. Here's what I mean:
p{
  font-size:2.5em;
 }

p::before{
        content:"before ";
        display:block;
        font-size:.5em;
    }
In this case, the P tag is the selected element. Setting a before or after pseudo-element is similar to how you would set a hover, active, or visited pseudo-class.
Here's what the above code will look like when opened in dev tools;
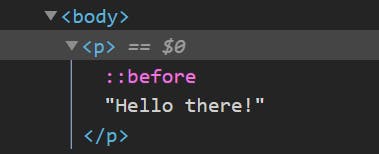
Notice that the ::before element is placed before the content of the p tag and not before the p tag itself.
The same applies for the ::after element, the difference is that the element is placed as the last child of the selected element.
These pseudo-elements are great for adding extra styling without adding extra markup.
Note: CSS3 specifications require that you set these pseudo-elements with double colons(::), although using a single colon would work just because of support, but it is advised to use double colons (::).
The Content property
The content property specifies what kind of content you want your pseudo-element to have, it can be a lot of things, for example:
- Text
content : "Hello there!"; - Images
content : url(https://images.unsplash.com/photo-15); - Quotations
content : open-quote "or" close-quote;
check here for a list of values the content property can take.
When using the ::before and ::after pseudo-elements, you have to include the content property, otherwise it defaults to display: none, and your pseudo-elements just become useless.
Pseudo-elements have a display: inline by default, but can be changed depending on your use case.
One downside to using these pseudo-elements is accessibility. These elements are created in our stylesheet, therefore they are not added to the DOM tree.
Some Use Cases
Let's look at a few examples, that showcase some scenarios where the ::before and ::after pseudo-elements might come in handy.
The example above shows how you can use the before and after pseudo-elements to add extra styling without adding extra markup. Here we created two little nudges on the calendar using the pseudo-elements.
Here's what the code looks like :
    &::before{
        content:'';
        width:10px;
        height:10px;
        background-color: #086972;
        border-radius: 0 10px 10px 0;
        position:absolute;
        top: 47%;
        display: block;
    }
    &::after{
        content: '';
        width: 10px;
        height: 10px;
        background-color: #086972;
        border-radius: 10px 0 0 10px;
        position: absolute;
        top: 47%;
        right: 0;
        display: block;
    }
Note: The ampersand is a SASS selector, it depicts the selected element, in this case, the div with a class of (.card)
Here's another example:
In this example, we created a list, but we created customizable bullet points using the before pseudo-elements and we added a bit of transition to the pseudo-element to create a subtle animation.
Let's see the code to see what's really happening;
 &::before{
            content:'';
            display:block;
            width:8px;
            height:8px;
            background-color: #303a52;
            position:absolute;
            right:12em;
            margin: 9px 10px 0 0 ;
            transition: border-radius 250ms ease-in;
        }

        &:hover::before{
            border-radius:100%;
        }
First of all, we created the pseudo-element then positioned it, next we transitioned the border-radius to 100% on hover.
Conclusion
Pseudo-elements are a great way to add extra styling without the need for extra markup, it presents a neat way to do unique styling without crowding the DOM tree extra markup.
If you liked this article, please subscribe to my newsletter for more articles and follow me on Twitter @D_Kingnelson